This guide explains how to upload and configure your organization's logo for display in the Tamam application. Adding your company logo helps create brand consistency and improves user recognition across the platform.
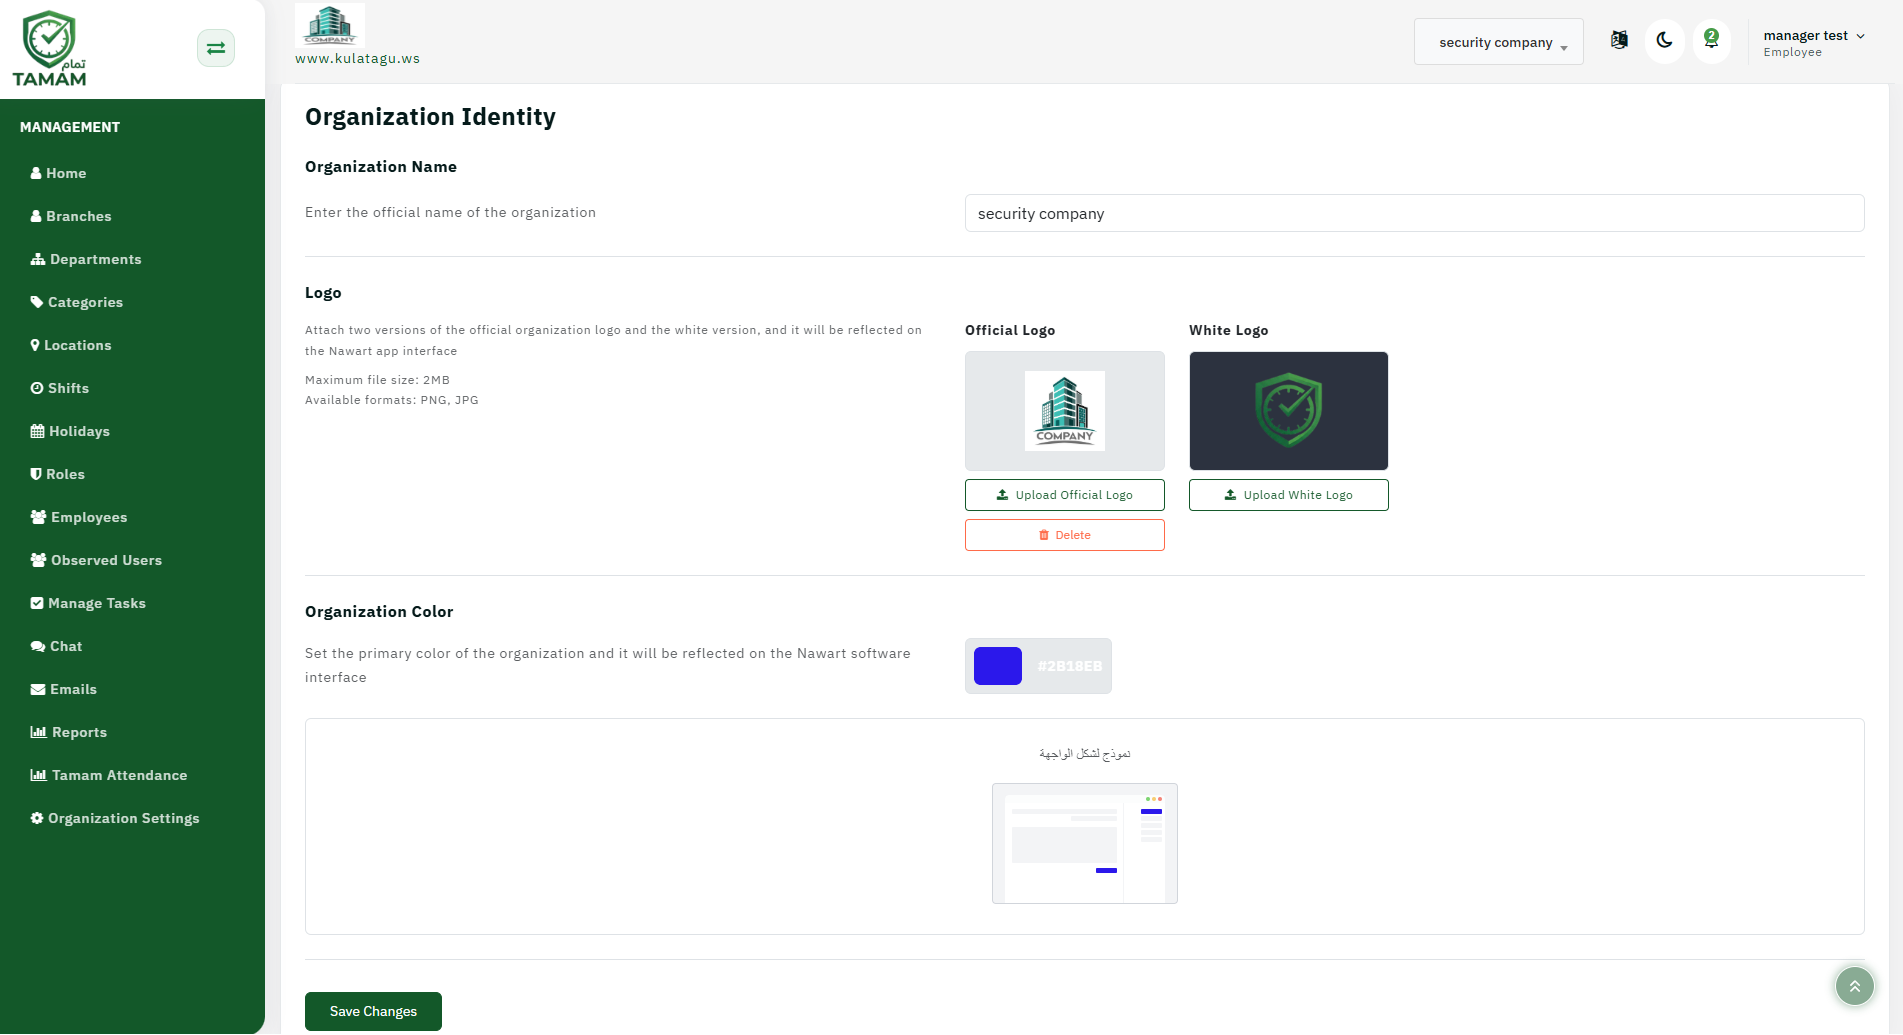
Step 1: Preparing the Logo
Ensure your logo meets the required specifications. Recommended formats include PNG, JPG, or SVG. The ideal size is typically 200x200 pixels for square logos, with a maximum file size of 2MB. Make sure the logo has sufficient contrast and is clearly visible on both light and dark backgrounds.
Step 2: Accessing Appearance Settings
Log in to your admin account and navigate to the Settings or Appearance section. Look for the Branding or Logo upload area. This section controls how your organization
Step 3: Uploading the Logo
Click the upload button and select your logo file from your computer. The system will automatically optimize the image for different display sizes. You may need to crop or resize the logo if it doesn
Step 4: Configuring Display Options
Set where and how the logo appears. Options typically include login screen, dashboard header, reports, and mobile app. You can also configure logo positioning, size, and transparency for different contexts.
Step 5: Previewing and Saving
Use the preview function to see how the logo looks in different parts of the application. Make adjustments as needed, then save your changes. The logo will be applied immediately or after a short processing period.
Step 6: Updating Across Platforms
If you have multiple Tamam instances or integrations, ensure the logo is updated consistently. Check mobile apps, web portals, and any connected systems to maintain brand consistency.
Important: Regularly review your logo usage and update it when your brand evolves. Test logo visibility on different devices and screen sizes to ensure optimal display.